
Photographing a volcano is a high-stakes game of risk and reward. You are contending with abrasive glass-shards (ash), corrosive gases that can eat through circuit boards, and the literal heat of the Earth’s mantle. To capture these landscapes successfully, you need more than just a good eye; you need a strategy for gear survival and technical precision.
This masterclass is divided into three critical modules: Hardware Fortification, Exposure Mastery, and Airborne Ethics.
Module 1: Ash-Proofing & Gear Fortification
Volcanic ash is not like beach sand. It is composed of fragmented volcanic glass and minerals with jagged, needle-like edges. It is electrically conductive, highly abrasive, and chemically reactive.
1. The “Sealed Environment” Strategy
If ash gets into your lens barrel or sensor chamber, it acts like sandpaper every time you zoom or focus.
- The “One Lens” Rule: Decide on your focal length at the trailhead and never swap lenses on the volcano. For most, a 24-70mm or 24-105mm provides the necessary range.
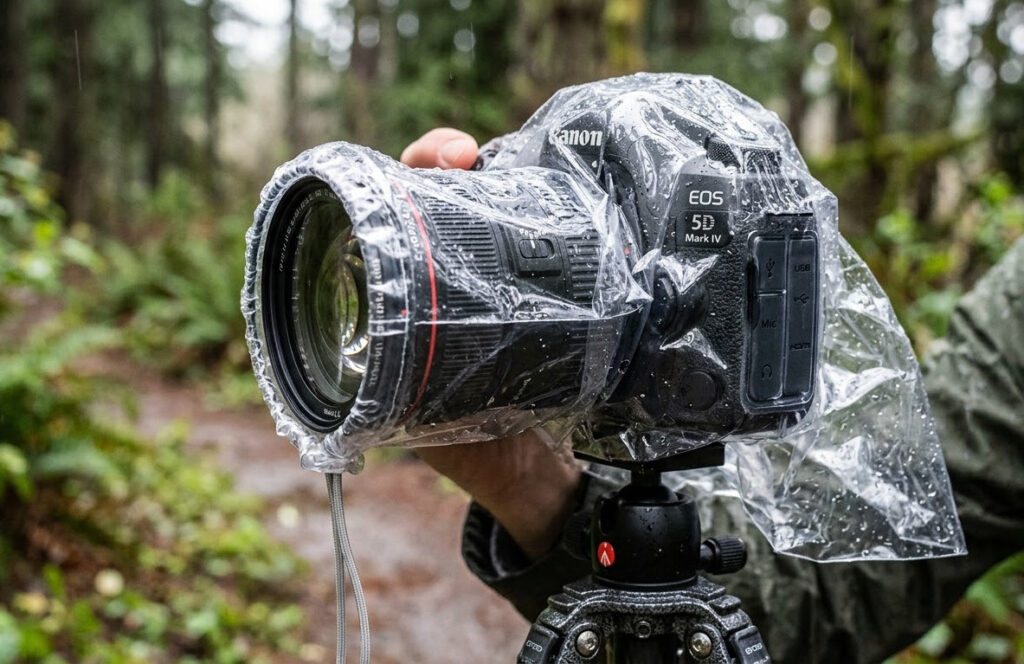
- Weather Sealing is Not Ash-Sealing: Even “weather-sealed” professional bodies have gaps in the zoom rings. Wrap your lens-body junction in self-adhesive silicone tape or heavy-duty plastic wrap.
- The UV Filter Sacrifice: This is the only environment where a high-quality UV filter is mandatory. If ash settles on your lens, you do not want to wipe it off the expensive front element. You want to wipe it off a $50 filter that you can throw away later.
2. Chemical Defense (Sulfur & Electronics)
Active vents release Sulfur Dioxide (SO2), which, when mixed with atmospheric moisture, creates a mild sulfuric acid.
- External Corrosion: SO2 can tarnish the gold-plated contacts on your lenses. Keep your gear inside a sealed dry bag until the moment you shoot.
- The Glove Protocol: Do not touch your camera with the same gloves you use to scramble over rocks. Volcanic rock dust on your fingertips will migrate into the camera’s buttons and dials, causing them to “crunch” or seize up.
Module 2: Lava Settings & Light Mastery
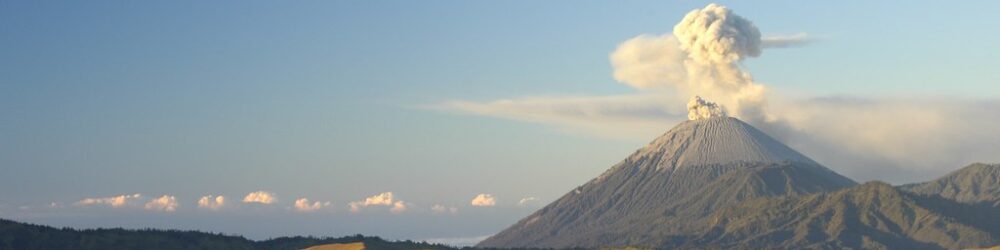
Lava is a unique light source: it is an “incandescent” subject that is often significantly brighter than its surroundings, creating a dynamic range nightmare.
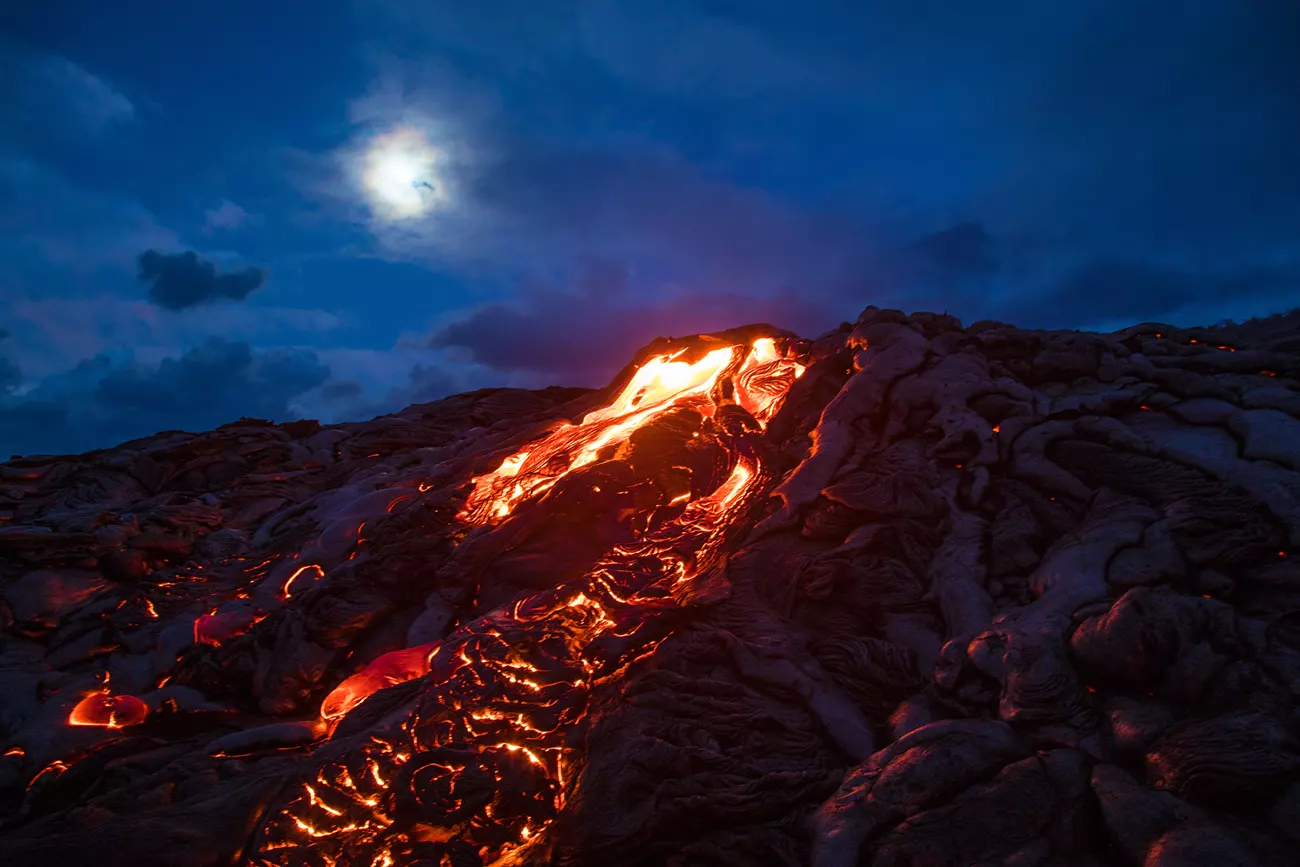
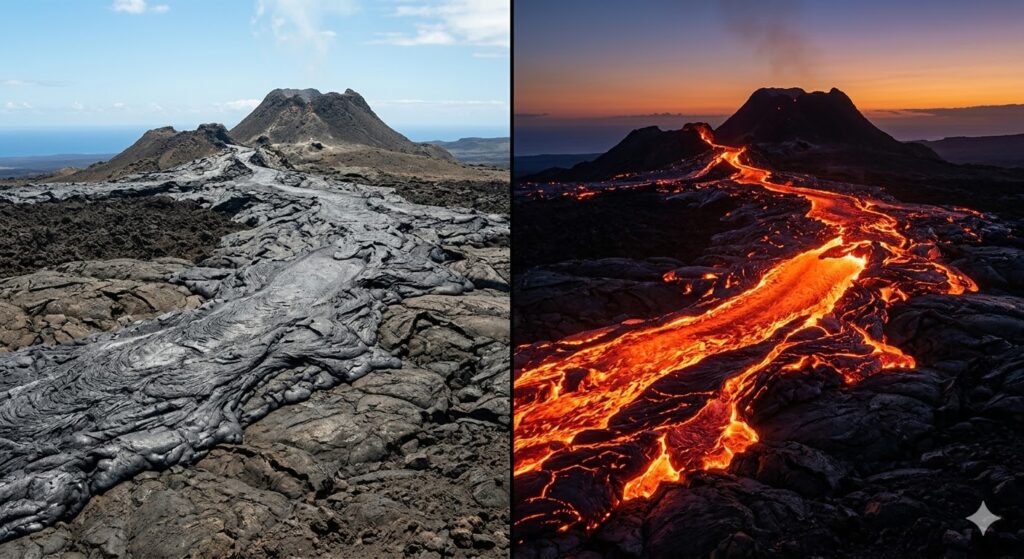
1. Blue Hour: The “Sweet Spot”
The best lava photos are rarely taken in total darkness. At night, the lava becomes a featureless white blob while the landscape becomes pitch black.
- The Goal: Aim for “Civil Twilight” (the 30 minutes after sunset). At this time, the ambient light in the sky is balanced with the luminosity of the lava, allowing you to capture detail in the black basaltic rocks and the glowing red flows in a single exposure.
2. Technical Settings for Flowing Fire
- Daytime Lava: You need a fast shutter speed (1/500s or higher) to freeze the “splatter” of a lava fountain. Use a Polarizer to cut the metallic glare off cooled, glassy lava flows.+1
- Nighttime Lava (The Starry Sky Shot): * Aperture: f/2.8 or f/4.
- ISO: 1600–3200.
- Shutter: 5–10 seconds.
- The Secret: Use a Reverse Neutral Density (ND) Filter. These filters are darkest in the middle, allowing you to dampen the bright horizon of the lava while keeping the stars at the top of the frame clear.
3. The “Heat Haze” Hurdle
Lava creates intense thermal ripples in the air. If you use a long telephoto lens (e.g., 400mm) from a distance, your images may look “soft” or blurry. This isn’t a focus issue; it’s the air boiling.
- Solution: Shoot in short bursts. Thermal ripples move like waves; one frame in a series of five is usually sharper than the rest.
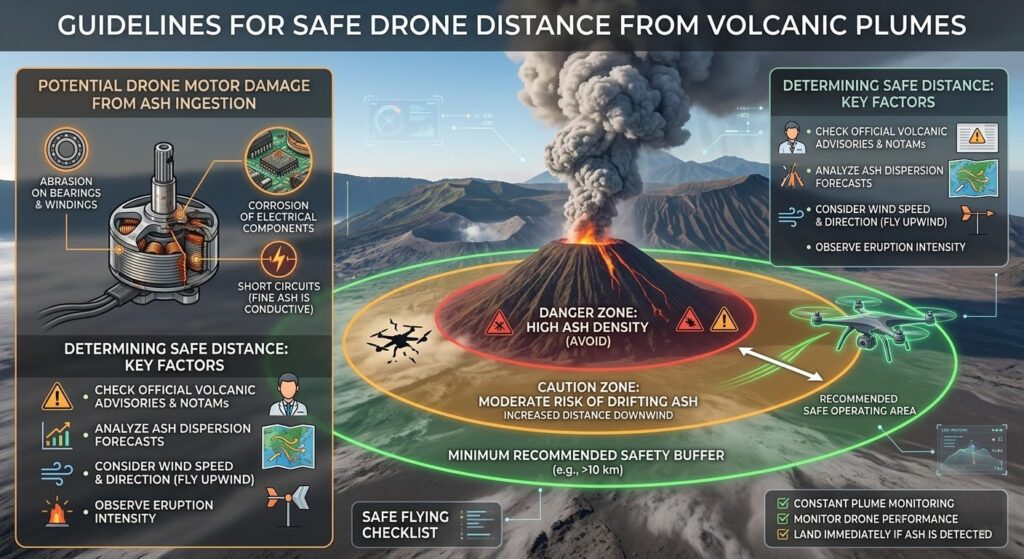
Module 3: Drone Rules & Aerial Ethics
Drones are the ultimate tool for volcano photography, offering perspectives of craters that are physically impossible to reach. However, 2026 regulations and volcanic physics make this a “pro-only” endeavor.
1. The 2026 Regulatory Landscape
As of 2026, global drone laws have tightened around “Sensitive Ecological Zones” and National Parks.
- The “National Park” Blanket Ban: In almost all major volcanic parks (Hawaii Volcanoes, Iceland’s Vatnajökull, Italy’s Etna), drones are prohibited without a Commercial Filming Permit. Fines in 2026 can exceed $5,000 USD.
- Remote ID: Ensure your drone’s Remote ID is broadcasting. Rangers now use handheld scanners to track the take-off location of unauthorized pilots.
- Visual Line of Sight (VLOS): On a volcano, it is tempting to fly “into” a crater. If you lose visual contact with the drone behind a rim or a steam plume, you are in violation of international flight safety laws.
2. The Physics of “Hot Air” Flight
Drones rely on air density to generate lift.
- The “Sink” Effect: Superheated air above a lava flow is much less dense than the surrounding air. If you fly your drone directly over a vent, it may “sink” suddenly as the rotors lose lift in the thin, hot air.
- Sensor Interference: Large concentrations of iron and magnetite in volcanic rock can cause “Compass Interference” errors. Always calibrate your IMU at the trailhead, away from the basaltic flows.
Module 4: The After-Action Clean Up
The most important part of volcano photography happens after the hike. If you put your “salty/ashy” camera back in its bag and leave it, you are inviting permanent damage.
- The External Blow: Use a high-pressure Rocket Blower to remove loose ash from the body. Do not use a cloth yet, as rubbing the ash will scratch the finish.
- The Damp Wipe: Use a microfiber cloth lightly dampened with distilled water (not tap water) to wipe down the exterior surfaces to remove any acidic sulfur residue.
- The Vacuum Trick: If ash has entered the battery compartment, use a small vacuum with a brush attachment to suck the particles out. Do not blow air into the compartment, as this will push ash deeper into the electronics.
- The Sensor Check: Once home, take a “dust reference” shot (f/22 against a white wall). If you see spots, do not attempt a dry-swipe. Volcanic ash is too sharp; take it to a professional for a wet-clean.
Summary Checklist for your Camera Bag:
- [ ] Rocket Blower (Large size)
- [ ] 6-10 Microfiber Cloths (Disposable is best here)
- [ ] Distilled Water (Small spray bottle)
- [ ] Ziploc Bags (For “dirty” cloths and used batteries)
- [ ] Spare Front Lens Cap (You will drop one into a crevice)